Asthma Zones: Understanding Control Levels and How to Manage Them
When you’re living with asthma, asthma zones, a color-coded system used to measure asthma control and guide daily decisions. Also known as asthma action plans, they’re not just paperwork—they’re your daily roadmap to breathing easier and avoiding emergencies. Think of them like a traffic light: green means you’re doing well, yellow means watch out, and red means act now. Most people don’t realize how much power they have in these zones. It’s not about how often you use your inhaler—it’s about whether you’re sleeping through the night, playing with your kids without gasping, or skipping work because your chest feels tight.
Asthma triggers, things like pollen, smoke, cold air, or even stress that worsen breathing, are what push you from green into yellow or red. But here’s the thing: knowing your triggers isn’t enough. You need to know what to do when they hit. That’s where the asthma action plan, a personalized, doctor-approved guide that tells you exactly what meds to take and when to call for help comes in. It’s not a one-size-fits-all sheet. It’s built around your symptoms, your peak flow numbers, and your history. If your plan doesn’t say what to do when your nighttime cough returns or your inhaler runs out faster than usual, it’s not working.
Many people wait until they’re in the red zone before they do anything. But the real win? Catching the yellow zone early. That’s when you’re still breathing okay, but something’s off—maybe you’re using your rescue inhaler more than twice a week, or you’re waking up with tightness. That’s your signal to adjust, not panic. It’s not about being perfect. It’s about being consistent. If you’ve ever had to rush to the ER because you thought "I’ll just wait and see," you know how risky that is. The right asthma zones turn fear into control.
You’ll find posts here that break down how to read your peak flow meter, what to do when your meds stop working as well as they used to, and how to talk to your doctor when your zones keep shifting. There’s also advice on avoiding common mistakes—like ignoring symptoms because you "feel fine" in the morning, or skipping controller meds when you’re not wheezing. These aren’t theory pages. These are real stories from people who learned the hard way—and now help others avoid it.
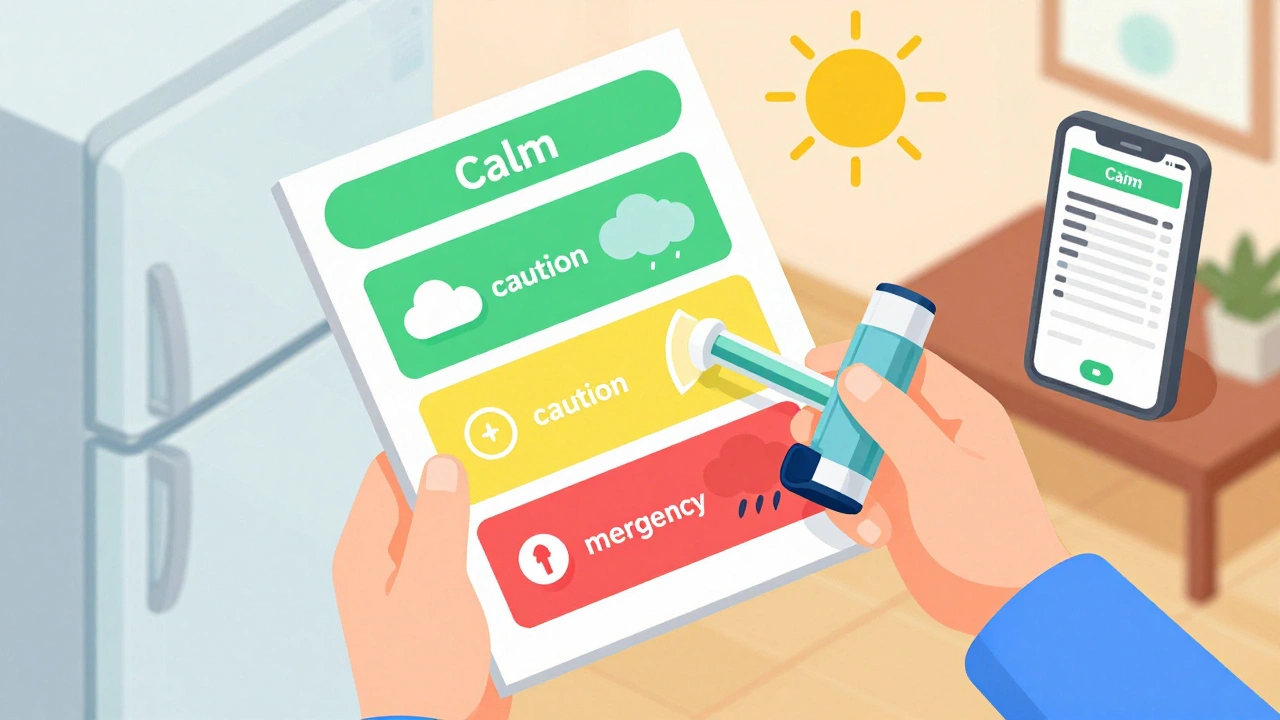
Learn how to build a personalized asthma action plan using the green-yellow-red zone system to prevent emergencies, improve daily control, and reduce hospital visits. Includes medication guidance, peak flow tips, and real-world use cases.